
Stained Glass Sugar Cookies
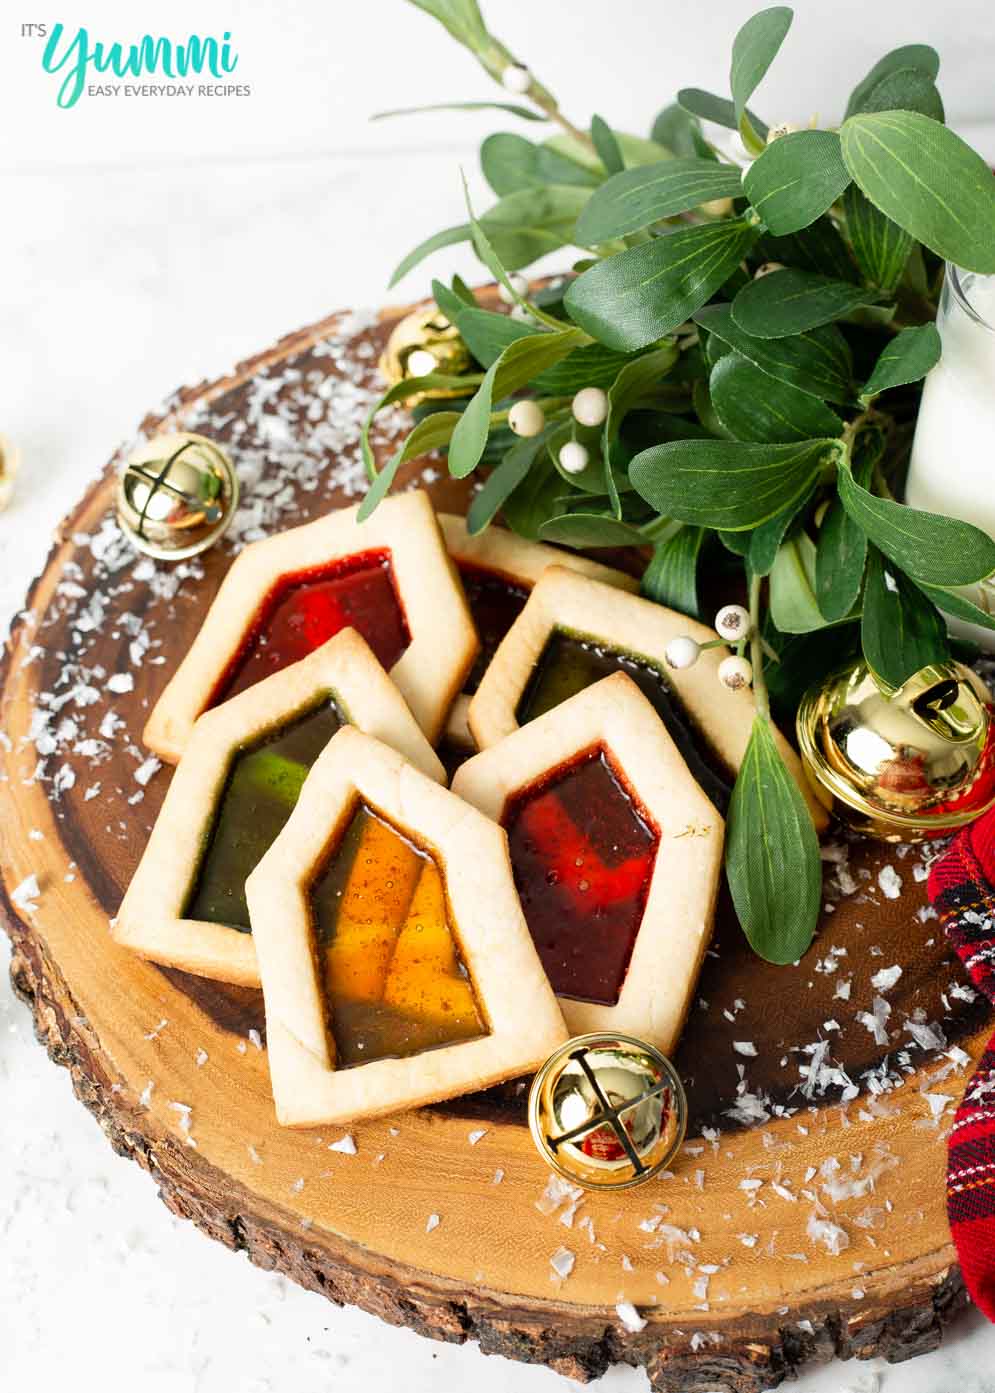
Stained Glass Cookies are beautifully delicious and easy to make. This classic cookie recipe will get you into the holiday spirit with their soft, butter cookie dough and melted candy centers using jolly ranchers.
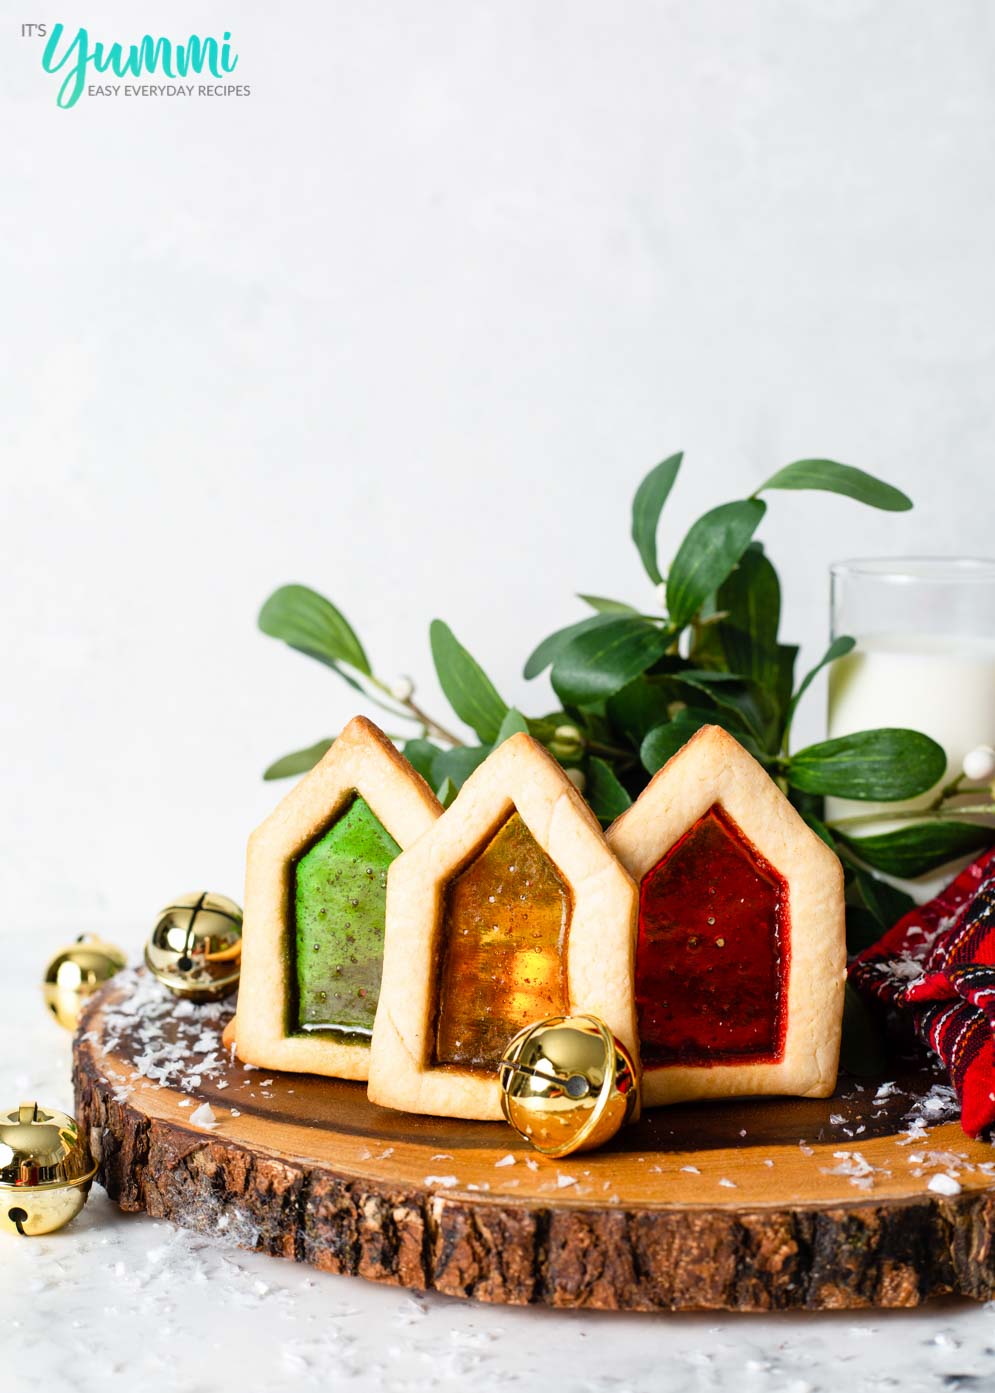
Stained glass sugar cookies are a tradition in our household, bringing the joys of the season in nibble worthy works of art. Think of these as edible holiday magic.
Stained glass cookies 101
These are SO pretty! Some details about our stained glass sugar cookies:
Can you freeze stained glass cookies? We’ve never actually tried to freeze these because they don’t make it that far at our house. No such thing as leftovers for us with these. But, you can freeze the cookies if you choose, just keep in mind that the candy center may be fragile and you’ll definitely want to thoroughly thaw your cookies before eating. Place the cookies uncovered to freeze, then put into a freezer bag.
Can you freeze cookie dough? if you have extra dough or are preparing ahead of time, you can freeze the dough itself for up to 3 months.
Are stained glass cookies hard to eat? Not unless you don’t love cookies! The stained glass part of these cookies ends up being thin and easy to enjoy.
How hard is it to make stained glass sugar cookies? The most difficult part of this recipe is being patient while the dough firms up in the refrigerator. Patience is a virtue.
How to Make Stained Glass Cookies
It all starts with a basic cut-out style cookie recipe. You can use butter cookie dough, shortbread, gingerbread, or even plain sugar cookie dough. We opt for our sugar cookie dough because it’s classic and pairs well.
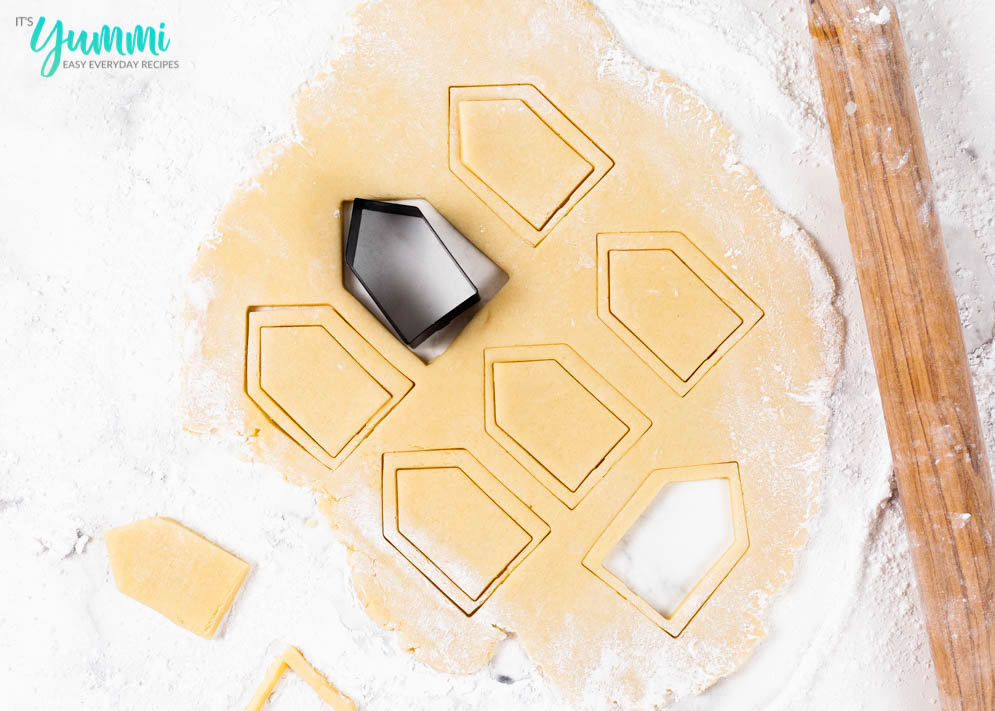
You can use any cookie cutter shape that you’d like, but keep in mind that you’ll need to find a similar shape, in a smaller size, to create the stained glass portion. After you have cut out the basic shape and removed the inner portion, chill the dough so that the shapes don’t spread during baking.
Making the sugar glass
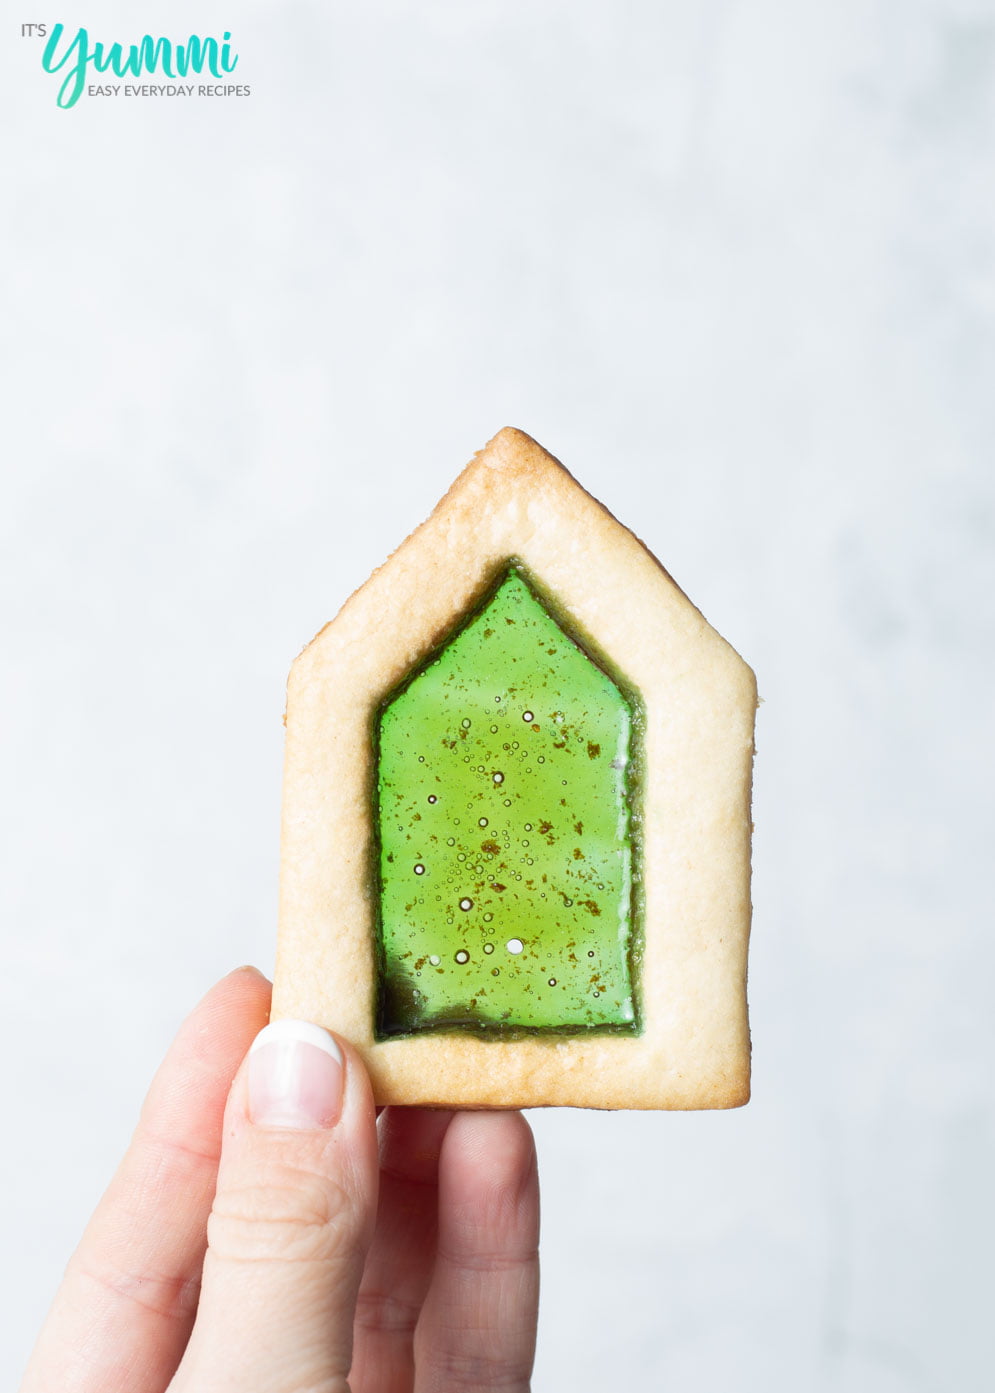
There are more difficult methods to making sugar glass (window glass) but we’ve found the easiest way to make sugar glass is with jolly ranchers!
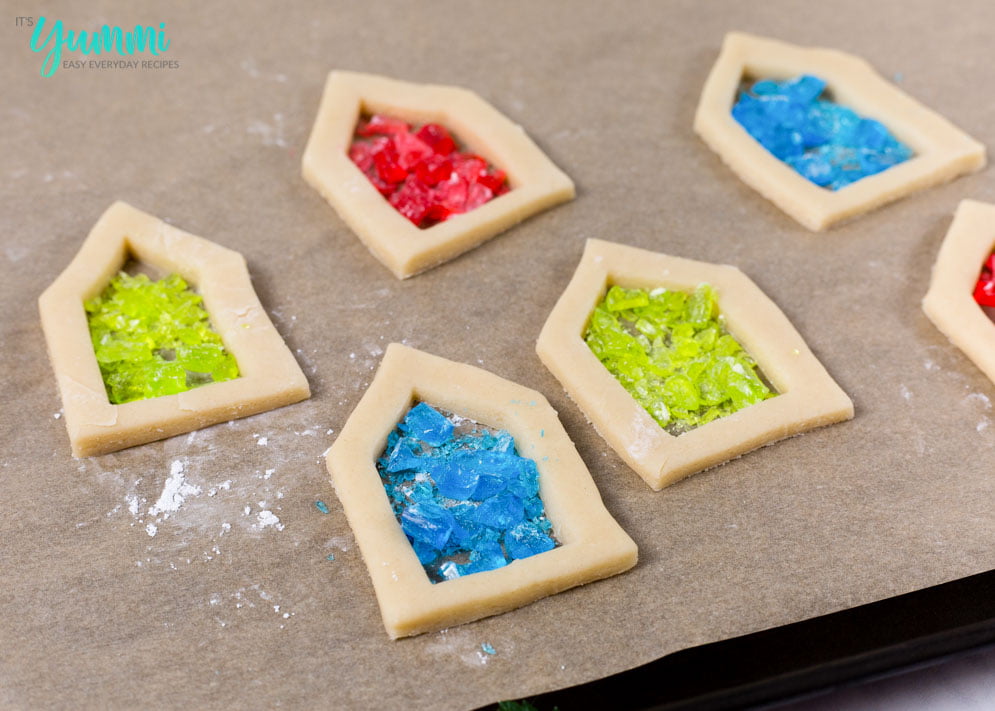
Place 6-8 pieces of a single color of candy into a gallon sized plastic bag. Make sure the bag is completely sealed, then cover it with a cloth. Crush the candies into tiny shards of candy, not a fine powder. Repeat this step for each color.
NOTE: the colors WILL change in the oven. We found our the blue jolly ranchers turned green and the green turned yellow. So JUST so you are aware. 😉
Remove the cookies from the refrigerator and preheat the oven. Meanwhile, place the crushed candies into the centers of your cut-outs, using a toothpick or small knife to push the candy into any tight corners.
After the cookies are finished baking, keep little fingers away (at least until the center has cooled.)
Stained Glass Cookies
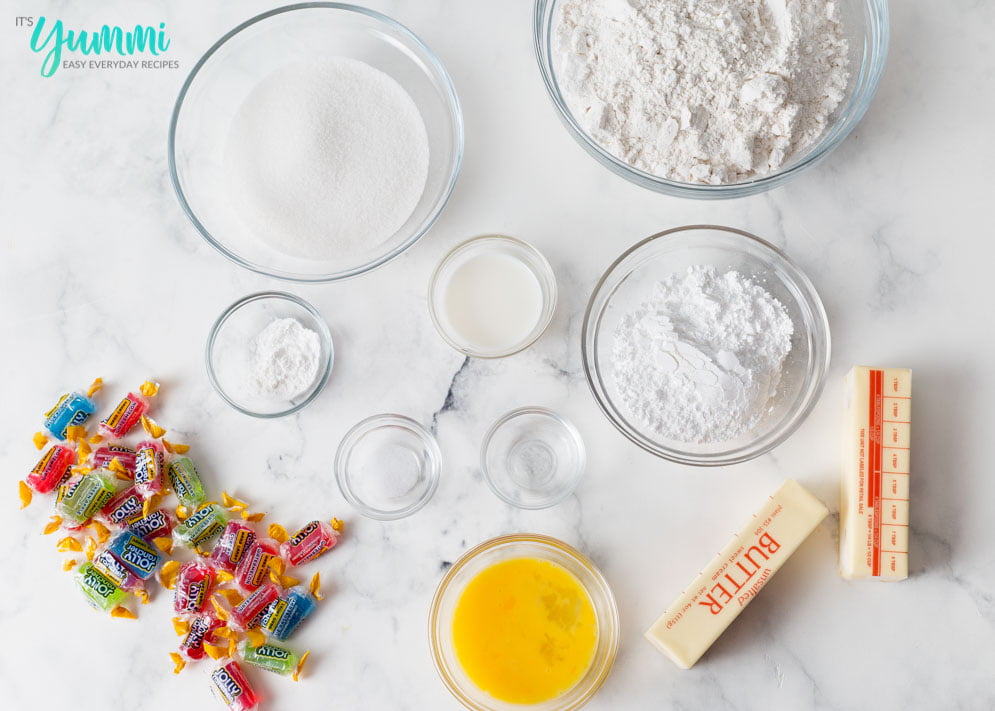
Ingredients
- 3 cups all-purpose flour
- ¾ teaspoon baking powder
- ¼ teaspoon salt
- 1 cup unsalted butter softened
- 1 cup granulated sugar
- 1 large egg beaten
- 1 Tablespoon milk
- 2 teaspoons clear vanilla extract (almond or lemon extract work too)
- Powdered sugar for rolling out the dough
- Assorted colored hard candies such as Jolly Ranchers or Lifesavers
Instructions
- Select two cookies cutters, making sure that one is small enough to fit inside of the other with at least 1/2 inch of cookie border around it.
- Sift together flour, baking powder, and salt. Set aside.
- Place butter and sugar into large bowl of an electric stand mixer and beat until light in color. Add egg and milk and beat to combine. Turn mixer to low speed and slowly add flour, mixing until the dough pulls away from the side of the bowl. Divide the dough in half, wrapping each in plastic wrap, and refrigerate for at least 1 hour (or as long as overnight).
- Sprinkle surface where you will roll out your dough lightly with powdered sugar. Line 2 cookie sheets with parchment paper or a silicone baking mat.
- Remove 1 wrapped pack of dough from refrigerator. Sprinkle rolling pin with powdered sugar and roll out dough to 1/4-inch thick. Move the dough around and check underneath frequently to make sure it is not sticking. If dough softens too much during rolling, place a cold cookie sheet on top for 10 minutes to chill, or place the dough back into the refrigerator.
- Using the larger cookie cutter, cut dough into desired shape. Use smaller cookie cutter to cut out the middle of each cookie. Transfer cookies to prepared cookie sheets, spacing them at least 1 inch apart. Place cookie sheet into refrigerator for 10-15 minutes while you prepare the candy to become stained glass centers.
- Heat your oven to 350 F.
- Unwrap and separate the hard candies into various colors, placing each color into a small zip top bag. Seal each bag tightly. Place a light dish towel over one bag.
- Using a rolling pin or something similar, carefully smash the candies into small pieces. Don’t smash too hard, as you want “shards” of candy, not a fine powder.
- Repeat the above steps with the other refrigerated ball of cookie dough.
- Fill the center of each cookie with ½ to 1 teaspoon of crushed candy. Use a toothpick or tip of a small knife to work the candy into the corners.
- Bake for 10-12 minutes, or until cookies are just beginning to turn brown around the edges and candy is hot and bubbling, rotating cookie sheet halfway through baking time.
- The candy will be bubbling when it comes out of the oven. This is normal and it will spread out and the bubbles will disappear when they cool down.
- Let baked cookies stay on baking sheet for 3 minutes after removal from oven, then transfer to a wire rack to finish cooling.
- Store in an airtight container at room temperature for up to 1 week or freeze for up to a month.
LUV LUV LUV these are just the PRETTIEST!!